
Last week we announced quite an innovative tool we are working on: the Infographics Gallery that lets content marketers easily get traction for the infographics they promote (provided they have unique content to go with the infographics).
 Our tool is in no way the linkbait-generation machine – there’s no way we can fake the viral effect, that’s true (and my experiment below only proves that). What it can do though is to help create the momentum or let you gain at least some traction for those infographics that fail to.
Going viral is really complex: you can’t fake it, you can’t predict it (with 100% certainty) but you can still help it, to some extent. Our tool is unique in many ways.
As the graphic content creator you get the full control over the infographic spread:
- You are able to choose which bloggers will publish your infographic (and choose the strongest publishers);
- You can get your infographic re-published as many times as you want (provided you have a unique and interesting description each time);
- You control the links and credits that accompany your infographic.
Here’s a quick video tutorial:
Here’s a quick case study on how I promoted my infographic on Social Spam and got it re-published 10 times in two days!
Step 1: Publish an infographic on your own blog
That’s what I did. The easiest part of that one is that it didn’t even require any indepth research or work. I simple re-packaged my Mashable guest post.
Step 2: Create interesting descriptions (mini-posts)
That doesn’t take much time especially if you did your own research before creating the infographic. Now, just brainstorm different ways to mini-refocus your research results in a number ways and get it done (while being an easy part, that’s the most complex one in the whole process).
For me these were, for example:
- Spam Free: Social Marketing Without Spamming
- Are Your Social Media Accounts at Risk?
- 3 Types of Social Media Spam You Didn’t Know You Created
- etc
Step 3: Upload the infographic to MyBlogGuest New Infographics Gallery
The process is still being refined, but for those who are used to our tools, that’s no-brainer. Just upload your infographic and publish all your unique descriptions (Pst… sorry for repeating “unique descriptions” again and again, but that’s the part many people still don’t seem to quickly understand).
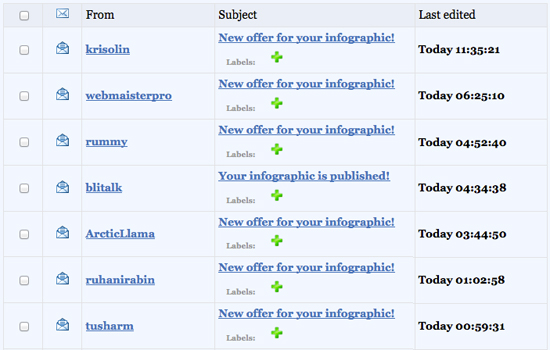
Step 4: Wait for the Offers: The more unique descriptions, the more offers!
The offers from bloggers will start coming to your email inbox as well as to your PM inbox at MyBlogGuest. You can check each one or you can wait for the offers to accumulate and come back in 6 hours to accept some while rejecting the others:
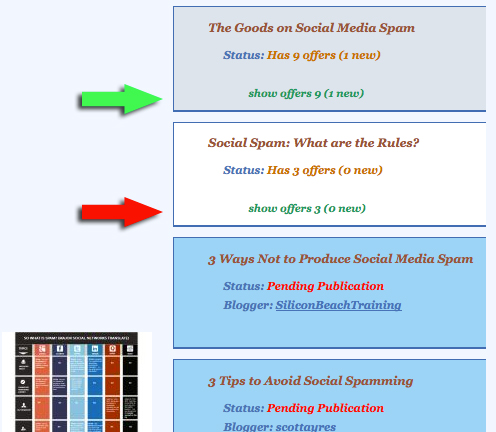
Step 5: Choose one offer per description (e.g. 10 descriptions = 10 offers)
If one description seems to be getting more traction, feel free to only accept the offers for some of them and let the rest hang in the gallery until you get an offer you can’t miss!
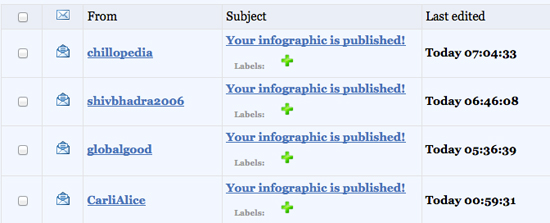
Step 6: Wait for the posts to go live!
This can take a few minutes for some blogs and a few days for others, but they all will get published. Again, PMs and emails will notify you of each published post for you to go ahead and help promote it for even more traction!
Step 7: Keep all the data online or download as CSV file!
At any point you can access all your published “guest infographics” within MyBogGuest (Published) folder as well as download all the data and keep in Excel file (if at any point you decide to discontinue the paid service, you’ll still have all the records to pitch the bloggers with your future guest articles or infographics)

Not all of my articles are live yet, but I have ten of them already in two days! Not bad at all considering most of the work is being done on auto-pilot!
What are your thoughts?
?Feel free to join My Blog Guest for free to give it a try!?
cc licensed ( BY ) flickr photo shared by Krikit ?